The Ulanzi Microphone is a versatile and high-quality audio device designed to enhance your recording experience. With features like superior sound clarity, versatile connectivity options, and a user-friendly design, this microphone is ideal for various recording scenarios. On the other hand, properly connecting and setting up the microphone is crucial for achieving optimal performance. In this post, we will consider how to setup and use the Ulanzi Microphone.
How to Use Ulanzi Microphone
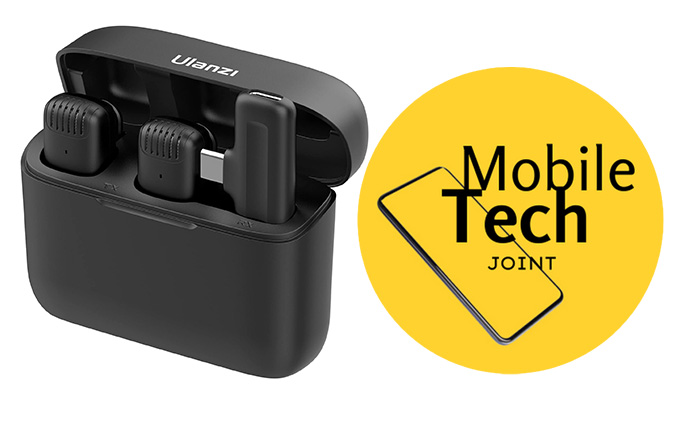
Featuring a compact design, excellent sound clarity, and easy connectivity, this Ulanzi Microphone is perfect for vloggers, interviewers, and musicians alike. The microphone offers a versatile and high-quality audio device designed to enhance your recording experience. Using a dedicated microphone significantly improves audio quality, making your videos and recordings more professional and engaging. Here is how to use:
Unboxing and Setup
When you receive your Ulanzi Microphone, the first step is unboxing it carefully. Inside the package, you’ll find the microphone itself, a windscreen, a mounting clip, a USB cable, and a user manual. Begin by removing all components from the box, ensuring you do not lose any small parts.
To set up the microphone, first attach the windscreen to reduce ambient noise. Next, use the mounting clip to secure the microphone to your desired position, whether it’s on a stand or directly on your camera. Connect the microphone to your recording device using the included USB cable. Make sure your device recognizes the microphone by checking the audio input settings.
Using the Microphone
The Ulanzi Microphone can be used in various scenarios, making it a versatile tool for different recording needs. For vlogging, attach the microphone to your camera and ensure it’s pointing towards your mouth for clear audio capture. In interview settings, position the microphone centrally between participants to capture dialogue evenly. For music recordings, place the microphone close to the sound source, whether it’s an instrument or a vocalist, to capture detailed audio.
To achieve the best sound quality, position the microphone close to the sound source and away from any background noise. Experiment with different angles and distances to find the optimal setup for your specific recording situation.
Adjusting Settings
The Ulanzi Microphone comes with adjustable settings to help you tailor the audio capture to your environment. You can adjust the volume levels directly on the microphone to ensure your audio isn’t too quiet or distorted. Additionally, some Ulanzi microphones offer directional settings, allowing you to choose between cardioid, omnidirectional, or bidirectional pickup patterns.
For a quiet indoor environment, a cardioid setting, which focuses on sound from one direction, is often ideal. In a noisier or outdoor setting, an omnidirectional setting may be better to capture sound from all directions evenly. Adjust the settings based on your environment and recording needs.
Troubleshooting Common Issues
While using the Ulanzi Microphone, you may encounter some common issues. If the microphone isn’t recognized by your device, ensure the USB cable is properly connected and check your device’s audio input settings. If the sound quality is poor, verify that the windscreen is attached and the microphone is positioned correctly.
For issues with background noise, try repositioning the microphone and adjusting the directional settings. Ensuring the volume levels are appropriately set can also help prevent audio distortion.
Recording Tips
To achieve the best audio quality with the Ulanzi Microphone, follow a few key tips. Always use the windscreen to minimize ambient noise and pop sounds. Position the microphone as close to the sound source as possible without causing distortion. In noisy environments, consider using soundproofing techniques or additional accessories like shock mounts to reduce vibrations.
Experiment with different recording environments and settings to find what works best for your specific needs. Regularly monitor your recordings to identify any issues early and make necessary adjustments.
Accessories and Add-Ons
To enhance the performance of the Ulanzi Microphone, consider using additional accessories. A shock mount can help reduce vibrations and handling noise, while a boom arm can provide flexible positioning options. External audio interfaces can further improve sound quality by offering advanced audio processing capabilities.
Using high-quality headphones during recording and playback can also help you monitor the audio more accurately and make necessary adjustments in real-time.
Comparison with Other Microphones
Compared to other similar products on the market, the Ulanzi Microphone stands out for its affordability, ease of use, and versatile features. While there are higher-end microphones with more advanced capabilities, the Ulanzi Microphone offers an excellent balance of quality and cost, making it a great option for beginners and intermediate users.
Its compact design and compatibility with a wide range of devices also make it a convenient choice for on-the-go recording, unlike some bulkier and more expensive options.
Conclusion
In summary, the Ulanzi Microphone is a reliable and versatile tool that significantly enhances audio quality for various recording needs. Its ease of setup, adjustable settings, and compatibility with different devices make it a valuable addition to any recording setup. Whether you’re a vlogger, interviewer, or musician, the Ulanzi Microphone is worth considering to improve your audio recordings. Try it out and share your experiences to discover the full potential of this excellent microphone.
Also Check:
- Elevate Your Mobile Filmmaking with the AOCHUAN Smart XE 3-Axis Smartphone Foldable Gimbal
- Ulanzi Zero y Lightweight Travel Tripod 3028: The Perfect Travel Companion
- How to Use Ulanzi Tripod: Mastering Your Shots
- Ulanzi Zero f38 Quick Release Travel Tripod 3131: What Makes Ulanzi Zero f38 Tripod…
- How to Open Ulanzi Tripod