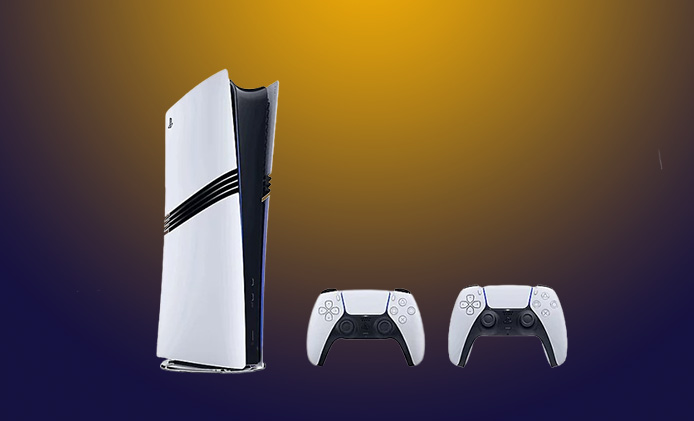
The PS5 Pro controller is an essential tool for many gamers, but over time, dirt and grime can accumulate, or certain components may need repairs. In this guide, we’ll take a deep dive into the step-by-step process to safely take apart a PS5 Pro controller for repairs or cleaning, and ensure you handle this task effectively without damaging the internal components.
Click Here to Buy the PS5 on Amazon Now
Key Takeaways
| Steps | Tools Required | Duration |
|---|---|---|
| Prepare workspace | Phillips 00 screwdriver | 5 minutes |
| Disassemble controller | Plastic spudger, tweezers | 15-20 minutes |
| Clean individual components | Isopropyl alcohol, cotton swabs | 10 minutes |
| Reassemble controller | Phillips 00 screwdriver | 15 minutes |
Tools and Preparation Needed for PS5 Pro Controller Disassembly
Before diving into disassembly, it’s important to have the right tools and workspace set up for success. Using improper tools can lead to scratches or permanent damage to your controller.
Essential Tools for Disassembling a PS5 Pro Controller
You’ll need a few basic tools to start the disassembly process:
- Phillips 00 screwdriver: This is a small, precision screwdriver for loosening the screws in the PS5 Pro controller.
- Plastic spudger or pry tool: A plastic tool that can gently pry open casings without scratching the surface.
- Tweezers: Useful for handling small, delicate components.
- Isopropyl alcohol (70% or higher): For safely cleaning the controller’s internals and electronics.
- Microfiber cloths and cotton swabs: To clean surfaces and small areas without causing damage.
Preparing Your Workspace
A well-prepared workspace is critical for safe disassembly. Here are some key steps to follow:
- Find a clean and well-lit workspace. It should be free of dust and debris, so no particles accidentally get into the controller during cleaning or repairs.
- Turn off the controller and unplug it from any power sources, ensuring no electrical charge remains.
- Have a small container for screws. Keeping screws organized will prevent you from losing them during reassembly.
- Take photos or note internal configurations. This will help later when it’s time to put everything back together.
Step-by-Step Guide to Safely Disassemble the PS5 Pro Controller
Disassembling a PS5 Pro controller requires patience and care. Follow these steps to safely take it apart:
Removing the Outer Shell
The PS5 Pro controller is composed of several internal layers housed within the outer shell. Here’s how to remove it:
- Use a spudger to gently pry open the side casing. Start from the bottom near the charging port and work your way up. Avoid using excessive force, as this can snap the clips.
- Unscrew the back panel screws. There are five screws located on the back of the controller. Use your Phillips 00 screwdriver to remove them. Keep these screws safe in your container.
- Once the screws are removed, gently separate the back panel from the main body of the controller. This will expose the internal components.
Disconnecting the Internal Components
After removing the outer casing, it’s time to handle the internal components. This part requires particular care, as the internal components are delicate:
- Disconnect the battery. Gently lift the battery connector using tweezers, ensuring you do not yank or damage the wires.
- Detach the ribbon cables. These cables connect various parts of the controller, like the touchpad, to the motherboard. Carefully unclip them using your fingers or tweezers.
- Remove the motherboard. There are four screws securing the motherboard to the housing. Remove these screws, and gently lift the motherboard out. Handle it with care to avoid bending or breaking any of the attached connectors.
By following these steps, you’ll have successfully disassembled the PS5 Pro controller, revealing its internal components for cleaning or repairs.
How to Clean the Disassembled PS5 Pro Controller Components
Now that your PS5 Pro controller is open and exposed, it’s time to focus on cleaning. Dirt, grime, and dust can accumulate, which may affect the controller’s performance. Regular cleaning can extend its life and prevent issues like sticky buttons or joystick drift.
Cleaning Plastic Parts and Buttons
- Use cotton swabs dipped in isopropyl alcohol to clean dirt and grime from the buttons and plastic parts. Focus on the edges and areas where dust tends to collect.
- For buttons that stick, gently scrub the area around the button housing with a microfiber cloth dampened with isopropyl alcohol.
Cleaning the Internal Components
- Motherboard cleaning should be done carefully. Avoid using excess moisture. Instead, lightly dampen a microfiber cloth with isopropyl alcohol and gently wipe down the motherboard to remove dust.
- Pay extra attention to areas around the joysticks and triggers, where grime tends to accumulate due to frequent use.
How to Reassemble the PS5 Pro Controller After Cleaning
Once everything is cleaned and dry, it’s time to reassemble your controller. Follow these steps to ensure a safe reassembly:
- Reconnect the motherboard to the front housing. Ensure the ribbon cables are reattached securely and the connectors are properly latched.
- Reattach the battery connector. Make sure it sits snugly in its slot without any loose wires.
- Place the back panel onto the controller and align the clips with their corresponding slots. Press gently to snap it back into place.
- Secure the back panel screws. Tighten the screws using the Phillips screwdriver to hold the controller together.
- Double-check all components to ensure nothing is loose or improperly connected.
Common Issues During Disassembly and How to Avoid Them
While disassembling the PS5 Pro controller is straightforward, there are potential issues you might face:
- Damaged clips: If you use too much force when prying the outer shell, you may damage the plastic clips holding the controller together. Always use gentle pressure.
- Loose ribbon cables: Failing to properly reconnect the ribbon cables can cause functionality problems like an unresponsive touchpad.
- Misplaced screws: Organizing screws properly is essential, as mixing them up can lead to issues with reassembly.
FAQs About Disassembling and Cleaning PS5 Pro Controllers
How often should I clean my PS5 Pro controller?
It’s a good idea to clean your controller every 3 to 6 months, depending on usage. Regular cleaning prevents issues caused by dirt buildup.
Can I clean the controller without taking it apart?
Yes, but it won’t be as thorough. Wiping the exterior with a microfiber cloth is a good practice, but disassembly allows you to clean internal components where dust and grime often hide.
What if my PS5 Pro controller stops working after reassembly?
Double-check that all ribbon cables and connectors are securely in place. If the controller still doesn’t work, you may have damaged a component during disassembly. Seek professional help if needed.
Also Check:
- Why the PS5 Slim Might Be the Perfect Fit for You—But I Picked the…
- PS5 Pro Hardware Specs Explained: What Makes It the Most Powerful Console Yet
- Can PS5 Pro Run 8k Resolution: Practical Realities Behind the PS5 Pro’s ability to…
- Why PS4 Pro is Better than PS5: 7 Reasons Why the PS4 Pro Outperforms the PS5 for Certain Gamers
- Best Laptops for Cybersecurity in 2024: Power, Security, and Reliability