Editing text on an iPhone is a crucial skill in our digital age. Whether you’re sending a quick message, jotting down notes, composing emails, or working on documents, the ability to efficiently edit text can save time and improve communication. This guide will explore various methods for editing text across different applications on your iPhone.
How to Edit Text in Messages on iPhone
Steps for editing text in the Messages app:
- Tap and hold the message you want to edit: Press your finger on the message bubble for about 1-2 seconds. You’ll feel a slight vibration or see an animation indicating that the long-press has been registered.
- Select “Edit” from the pop-up menu: A menu will appear with several options. “Edit” should be one of them, usually near the top. If you don’t see “Edit,” it may be because the message is too old (Apple typically allows editing only for recently sent messages).
- Make your changes: The message will now appear in an editable text field. You can add, delete, or modify text as needed. The keyboard will appear automatically.
- Tap “Send” to update the message: After making your edits, the “Send” button will turn blue. Tap it to confirm your changes. The original message will be updated, and recipients will see a small “Edited” label beneath it.
Tips for quickly correcting mistakes:
- Use the predictive text bar: This bar appears just above the keyboard with word suggestions. It learns from your typing habits over time, becoming more accurate. You can often find the correct word here faster than typing it out.
- Shake to undo: This gesture works across many iOS apps. Shake your device gently, and an “Undo Typing” dialog will appear. You can also redo by shaking again.
- Double-tap word selection: This is faster than trying to position the cursor precisely. After double-tapping, you can drag the blue handles to adjust the selection if needed.
How to Edit Text in Notes on iPhone
How to edit text in the Notes app:
- Open the note: In the Notes app, tap on the specific note you want to edit. If it’s in a folder, navigate to that folder first.
- Tap to edit: Tap anywhere in the note’s body. The keyboard will appear, and you’ll see a blinking cursor where you tapped.
- Make changes: Type new text, delete existing text, or cut and paste as needed. You can also use the predictive text bar for quicker word entry.
- Save changes: In Notes, saving is automatic. When you’re done editing, simply tap “Done” in the top-right corner to close the keyboard and exit edit mode.
Using formatting options:
- Formatting toolbar: Tap the “Aa” button above the keyboard to reveal formatting options. Here you’ll find options for text size, bold, italic, underline, strikethrough, and more.
- Lists: In the formatting toolbar, you’ll see icons for bulleted, dashed, and numbered lists. Tap one to start a list. Each time you press return, a new list item is created.
- Tables: The table icon in the formatting toolbar lets you insert a table. You can then add or delete rows and columns as needed, and even add simple formulas.
How to Edit Text in Emails on iPhone
Tips for editing text in the Mail app:
- Start editing: Tap once in the body of the email to position the cursor. Tap and hold to bring up the magnifying glass for more precise cursor placement.
- Selection tools: Double-tap a word to select it. Drag the blue handles to adjust the selection. Alternatively, tap and hold, then choose “Select” from the pop-up menu to select a larger portion of text.
- Formatting options: After selecting text, a pop-up menu appears with options like bold, italic, underline, and more. You can also adjust font size and color from here.
Proofreading and revising:
- Preview function: This shows you exactly how your email will look to the recipient, including any formatting or attachments.
- Reading aloud: This technique helps you catch awkward phrasing, repeated words, or missing punctuation that you might miss when reading silently.
- Mark Up feature: This is particularly useful for PDFs or images. You can add text, draw, highlight, or even add a signature to attachments before sending.
How to Edit Text in Documents on iPhone
Features for editing text in document editing apps:
- Ruler for margins and indents: The ruler usually appears at the top of the document. You can drag markers on the ruler to adjust margins and paragraph indents.
- Styles: Using styles (like Heading 1, Body Text, etc.) ensures consistency throughout your document. It also makes it easy to update formatting across the entire document by modifying the style definition.
- Find and replace: This feature is invaluable for making consistent changes throughout a long document. You can often set options like “Match case” or “Whole words only” for more precise replacements.
Collaborating with others:
- Sharing and permissions: When sharing a document, you can usually set permissions like “Can edit,” “Can comment,” or “View only.” Be sure to choose the appropriate level for each collaborator.
- Comments: Comments allow you to suggest changes or ask questions without altering the main text. They’re usually visible in a sidebar or as icons within the document.
- Track changes: This feature, available in many document editing apps, allows you to see exactly what changes have been made, by whom, and when. You can then choose to accept or reject each change individually.
Keyboard shortcuts:
- Double-tap the space bar to add a period and space: This shortcut automatically adds a period followed by a space when you double-tap the space bar. It’s particularly useful when typing longer texts, as it saves you from manually adding punctuation at the end of each sentence. After using this shortcut, the next word will be automatically capitalized.
- Tap and hold letters to access accented characters: For languages that use accented characters, or when you need to use a special character, tap and hold a letter on the keyboard. A pop-up will appear showing various accented versions of that letter. Slide your finger to the desired character and release to select it. For example, holding ‘e’ will show options like é, è, ê, ë.
- Use the globe key to switch between keyboards: If you have multiple keyboards installed (e.g., different languages or emoji keyboard), tap the globe key (located next to the ‘123’ key) to quickly switch between them. If you have more than two keyboards, holding the globe key will show a list of all available keyboards for quick selection.
Using Text Editing Gestures:
iOS offers several gestures to streamline text editing:
- Double-tap to select a word: Quickly tap twice on any word in your text. The word will be highlighted, and selection handles will appear on both ends. This gesture works in most text fields and apps across iOS. After selection, you can drag the handles to adjust the selection, use the pop-up menu to cut, copy, or apply formatting, or start typing to replace the selected word.
- Triple-tap to select a sentence: Tap three times in quick succession on any part of a sentence. The entire sentence will be highlighted, from the first word to the punctuation mark. This is particularly useful when you want to move, delete, or rewrite entire sentences. In some contexts, like web browsers, this might select a paragraph instead, depending on the content structure.
- Quadruple-tap to select a paragraph: Tap four times quickly on any part of a paragraph. The entire paragraph will be highlighted. This gesture is incredibly useful for longer texts, allowing you to quickly select large chunks of content. It’s especially handy in apps like Notes, Mail, or word processors.
- Shake to undo typing: After typing or deleting text, give your iPhone a quick shake. An “Undo Typing” dialog will appear, asking if you want to undo your last action. Tap “Undo” to confirm, or “Cancel” if you shook by accident. You can keep shaking to undo multiple actions in sequence. To redo, shake again and you’ll see a “Redo Typing” option
Additional helpful gestures:
- Pinch with three fingers: This gesture provides a quick way to copy text without using the traditional copy button. To use it, first select the text you want to copy. Then, place three fingers on the screen and pinch them together (bring them closer) in a single, smooth motion. You’ll see a brief animation at the top of the screen confirming that the text has been copied. This gesture is particularly useful when you need to copy text quickly and repeatedly, as it can be faster than using the standard copy option from the pop-up menu.
- Pinch with three fingers twice: This gesture is similar to the copy gesture, but it cuts the text instead. After selecting the text, quickly pinch inward with three fingers twice in succession. The selected text will be removed from its original location and stored in the clipboard. You’ll see a brief animation confirming the cut action. This gesture is helpful when you want to move text from one place to another, especially when working with longer documents or across different apps.
- Spread with three fingers: This is the counterpart to the copy and cut gestures, allowing you to paste text without using the paste button. Position your cursor where you want to paste the text, then place three fingers on the screen and spread them apart in a single motion. The previously copied or cut text will be inserted at the cursor position. This gesture is particularly useful when you’re working with multiple apps or documents and need to paste content quickly and efficiently.
- Swipe left/right with three fingers: These gestures provide a quick way to undo and redo actions without shaking your device or using the undo/redo buttons. Swiping left with three fingers undoes your last action. This could be typing, deleting, formatting, or any other editable action. You can perform this gesture multiple times to undo several actions in sequence.
- Swipe right with three fingers: Swiping right with three fingers redoes the last undone action. This is useful if you’ve undone something by mistake or change your mind about an undo. Like the undo gesture, you can perform this multiple times to redo several actions. These swipe gestures are particularly useful when working with longer documents or when you need to quickly revert or reinstate changes without interrupting your workflow.
Using autocorrect and predictive text:
- Add custom words to your dictionary for frequent use: When you type a word that iOS doesn’t recognize, it will often underline it in red. Tap the word, and if it’s correct, choose “Learn Spelling” from the pop-up menu. This adds the word to your dictionary, and iOS won’t try to correct it in the future. This is particularly useful for names, technical terms, or jargon you use frequently.
- Use text replacement for common phrases or symbols: Go to Settings > General > Keyboard > Text Replacement. Here, you can create shortcuts for longer phrases. For example, you could set “omw” to expand to “On my way!” or create a shortcut for your email address. This can significantly speed up your typing for frequently used phrases.
- Learn to trust (but verify) autocorrect suggestions: Autocorrect can be a powerful tool when used correctly. As you type, pay attention to the suggestions that appear above the keyboard. Often, the correct word will appear before you’ve finished typing it. Simply tap the space bar to accept the suggestion. However, it’s always good to quickly review your text before sending it, as autocorrect can sometimes make unexpected changes.
- Use the keyboard as a trackpad: On devices with 3D Touch or Haptic Touch, press and hold the keyboard until it turns blank. You can then slide your finger around to move the cursor precisely within your text.
- Quickly delete text: Instead of holding the delete key to remove text, you can shake your device to undo typing. This works across many apps and can be faster for deleting larger chunks of text.
- Use QuickPath swipe typing: iOS 13 and later versions support swipe typing. Instead of tapping each letter, you can slide your finger from one letter to the next without lifting it. The keyboard will predict the word you’re trying to type.
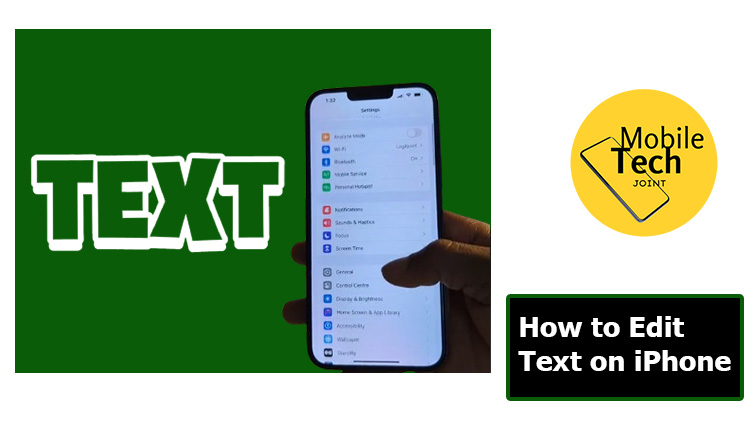
- Customize keyboard settings: In Settings > General > Keyboard, you can customize various keyboard behaviors. For example, you can turn off auto-capitalization, enable or disable predictive text, or adjust the key repeat rate.
By mastering these techniques, you can significantly improve your text editing efficiency on your iPhone. Remember, practice makes perfect – the more you use these features, the more natural and quick they’ll become.
Conclusion
Text editing on your iPhone can significantly enhance your productivity and communication skills. From quick message edits to detailed document revisions, the tools are at your fingertips. Remember, practice makes perfect – the more you use these features, the more natural and efficient they’ll become.
Explore different editing techniques across various apps and find the methods that work best for you. With time and practice, you’ll become a proficient iPhone text editor, able to craft and refine your messages with ease and precision.
Also Check: