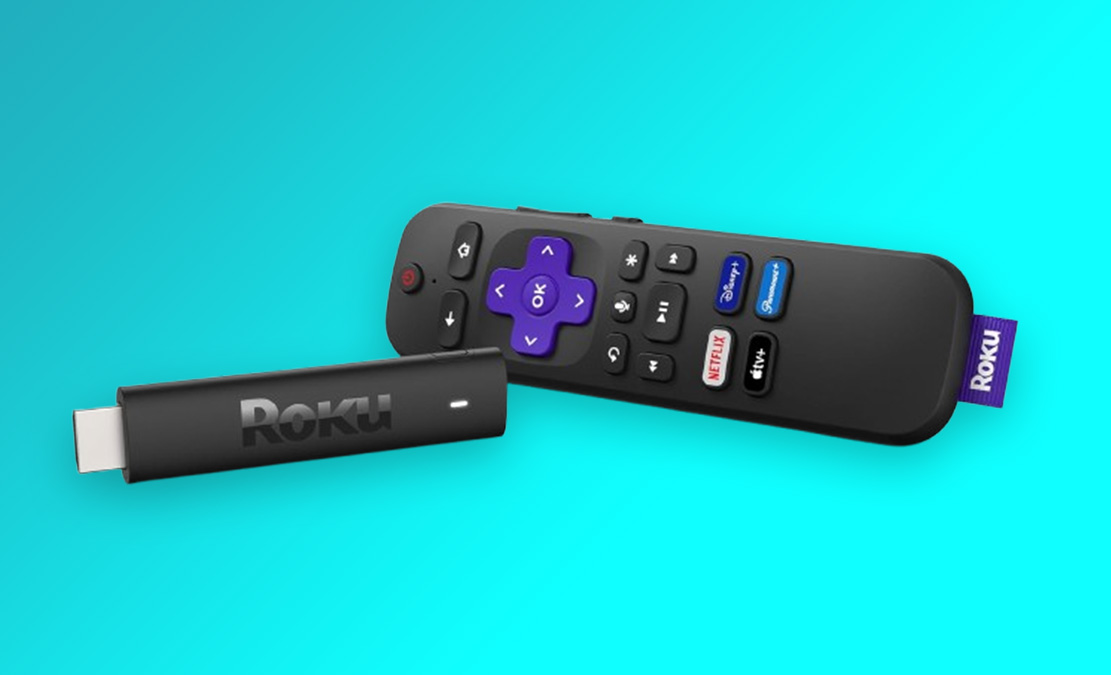
Setting up a Roku Streaming Stick 4K may seem daunting at first, but with this step-by-step guide, you’ll be streaming your favorite shows in crystal-clear 4K in no time. Whether you’re new to streaming devices or upgrading from an older model, this guide will walk you through everything you need to know to unbox, set up, and customize your Roku experience.

Key Takeaways
- Quick Setup: From unboxing to streaming, the Roku Streaming Stick 4K can be set up in minutes.
- Power Source: Always use the dedicated power adapter for the best performance.
- 4K Streaming: Ensure your internet speed is at least 25 Mbps to enjoy 4K UHD content without buffering.
- Customization: Roku lets you add and organize apps for a personalized experience.
- Common Fixes: Troubleshoot issues with proper HDMI connections and ensure your Wi-Fi connection is strong.
What You’ll Need for Roku Streaming Stick 4K Setup
Before we dive into the steps, here are some things you’ll need:
- Roku Streaming Stick 4K (included in the box)
- Remote control (with batteries)
- Power adapter and USB cable
- HDMI-enabled TV with an open port
- Stable Wi-Fi connection with good speeds (preferably for 4K streaming)
Pro Tip: A fast and stable internet connection is essential for streaming in 4K. Roku recommends a minimum of 25 Mbps for 4K UHD streaming.
| Requirement | Importance |
|---|---|
| HDMI-enabled TV | Essential for connecting Roku stick |
| Wi-Fi with good bandwidth | Ensures smooth 4K streaming |
| Remote with batteries | To control and navigate the device |
Step 1 – Connecting Your Roku Streaming Stick 4K to Your TV
The first step in setting up your Roku Streaming Stick 4K is physically connecting it to your TV.
- Insert the Roku Stick: Plug the Roku Streaming Stick 4K into the HDMI port of your television.
- If you’re using a 4K TV, ensure the port is HDCP 2.2 compatible to fully enjoy 4K content.
- Connect to Power: You have two options for powering your Roku:
- Power through TV USB port: Plug the USB cable into the TV’s USB port if available.
- Use the power adapter: Roku advises using the provided power adapter for a more stable power source, especially for 4K streaming.
- Turn on the TV and switch to the correct HDMI input.
Did You Know? A common issue is not using the power adapter, which can lead to insufficient power. Avoid potential setup issues by using the dedicated power adapter when possible.
Step 2 – Setting Up Wi-Fi and Initial Configuration
Once your Roku Streaming Stick 4K is physically connected, it’s time to configure your network settings.
- Turn on the TV and use your remote to select the correct HDMI input.
- Follow the On-Screen Prompts to select your language preference.
- Wi-Fi Setup:
- Select your Wi-Fi network from the list of available networks.
- Enter your Wi-Fi password.
- If the connection fails, check your internet speed or try moving closer to the router.
Pro Tip: Ensure you have at least 25 Mbps for streaming in 4K. Lower speeds can lead to buffering, especially when using multiple devices.
Step 3 – Roku Software and Account Setup
Now that your Roku Streaming Stick 4K is connected to your Wi-Fi, you need to create or log into your Roku account.
- Create/Log in to Roku Account: You’ll be asked to sign in or create a Roku account. If you don’t have one, follow the prompts to sign up on Roku’s official website.
- Enter the Activation Code: Once logged in, you’ll be provided an activation code. Enter this code at roku.com/link.
- Download Software Updates: Roku will automatically check for and install any software updates. This process ensures your device is running the latest firmware for optimal performance.
Case Study: According to user reports, many setup issues are resolved by ensuring the Roku device is running the latest software. Always perform updates as prompted.
Step 4 – Customizing Your Roku Streaming Stick 4K Experience
After completing the initial setup, you can start customizing your Roku home screen.
- Add Channels and Apps: Navigate to the Channel Store to add apps like Netflix, Hulu, Amazon Prime Video, or any of your favorite streaming services.
- Roku offers both free and paid channels.
- Organize Your Home Screen: You can move, delete, or add new channels by pressing the “Options” button on your remote.
- Remote Control Customization: Go to Settings > Remote to pair additional remotes or set up voice controls for easier navigation.
Fun Fact: Did you know you can personalize your Roku by creating shortcuts to your favorite streaming channels? Simply press and hold the remote’s shortcut buttons.
Troubleshooting Common Roku Streaming Stick 4K Setup Issues
Even with an easy-to-follow setup process, sometimes things can go wrong. Here’s how to troubleshoot common issues:
- No Signal on TV:
- Ensure the HDMI port is selected correctly on your TV.
- Double-check the power supply.
- Wi-Fi Connectivity Issues:
- Move your router closer to the Roku or use a Wi-Fi extender.
- Verify that other devices can connect to your Wi-Fi to rule out network issues.
- Remote Not Pairing:
- Reinsert the batteries or reset the remote by holding the pairing button.
Final Thoughts on Roku Streaming Stick 4K Setup
Setting up the Roku Streaming Stick 4K is straightforward, especially when you follow this guide. Once you’ve connected it, configured your Wi-Fi, and activated your account, you’ll have access to a world of content. To enhance your experience, be sure to add your favorite channels, explore Roku’s customization options, and keep your device updated.
With a reliable internet connection, your 4K streaming experience on Roku will be smooth and seamless. Just sit back, relax, and enjoy your favorite content in stunning 4K clarity!
